How to Click and Drag on a MacBook?

Enable Drag Clicking On MacBooK

It seems quite difficult to click and drag on the MacBook. If you were asked that how to click and drag in laptop the traditional dragging and dropping feature must haunt your mind that is to press and hold the mouse or the trackpad and move your finger over the mouse or trackpad until you reach the desired position where the object needs to be dragged and release it when you reach the desired position. The object will be dragged.


But if you try to do the same on a MacBook it will not drag and drop it. You might think that MacBook does not sense these activities. So “how to click and drag on mac.” MacBook supports the traditional dragging feature but this feature is disabled in the MacBook by default. All you need is to “Enable dragging”.

How To Enable Dragging In A MacBook?

The dragging in the MacBook can be easily enabled by following a series of simple steps. These easy steps are as follow:

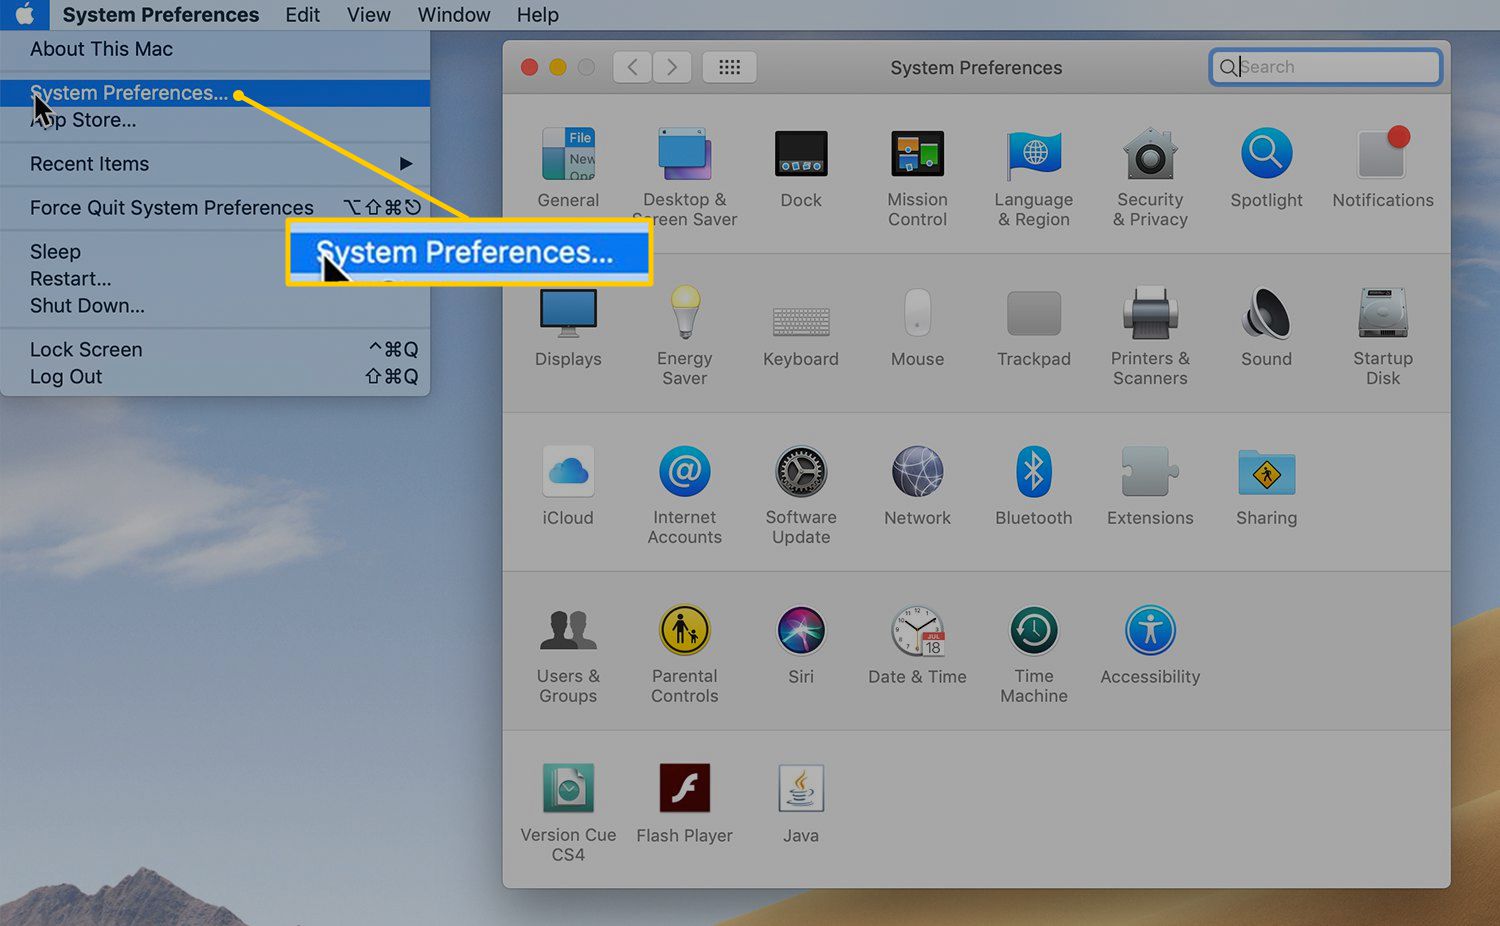
  • Choose the Apple Menu from the top left corner.
  • Under this menu lies the feature of System Preferences. Click on this option.

System Preference Setting on MacBook

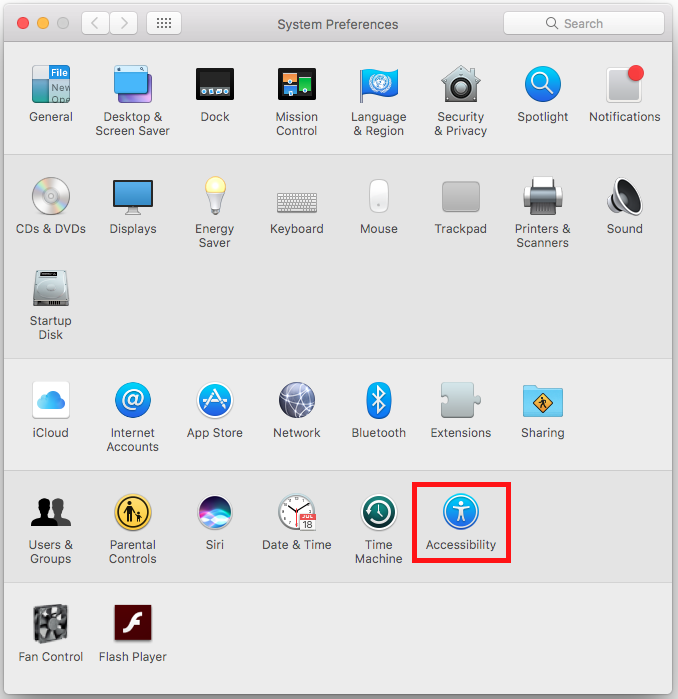
  • After that click on the Accessibility Feature that is available under the option of system preferences.

Accessibility Feature On MacBook

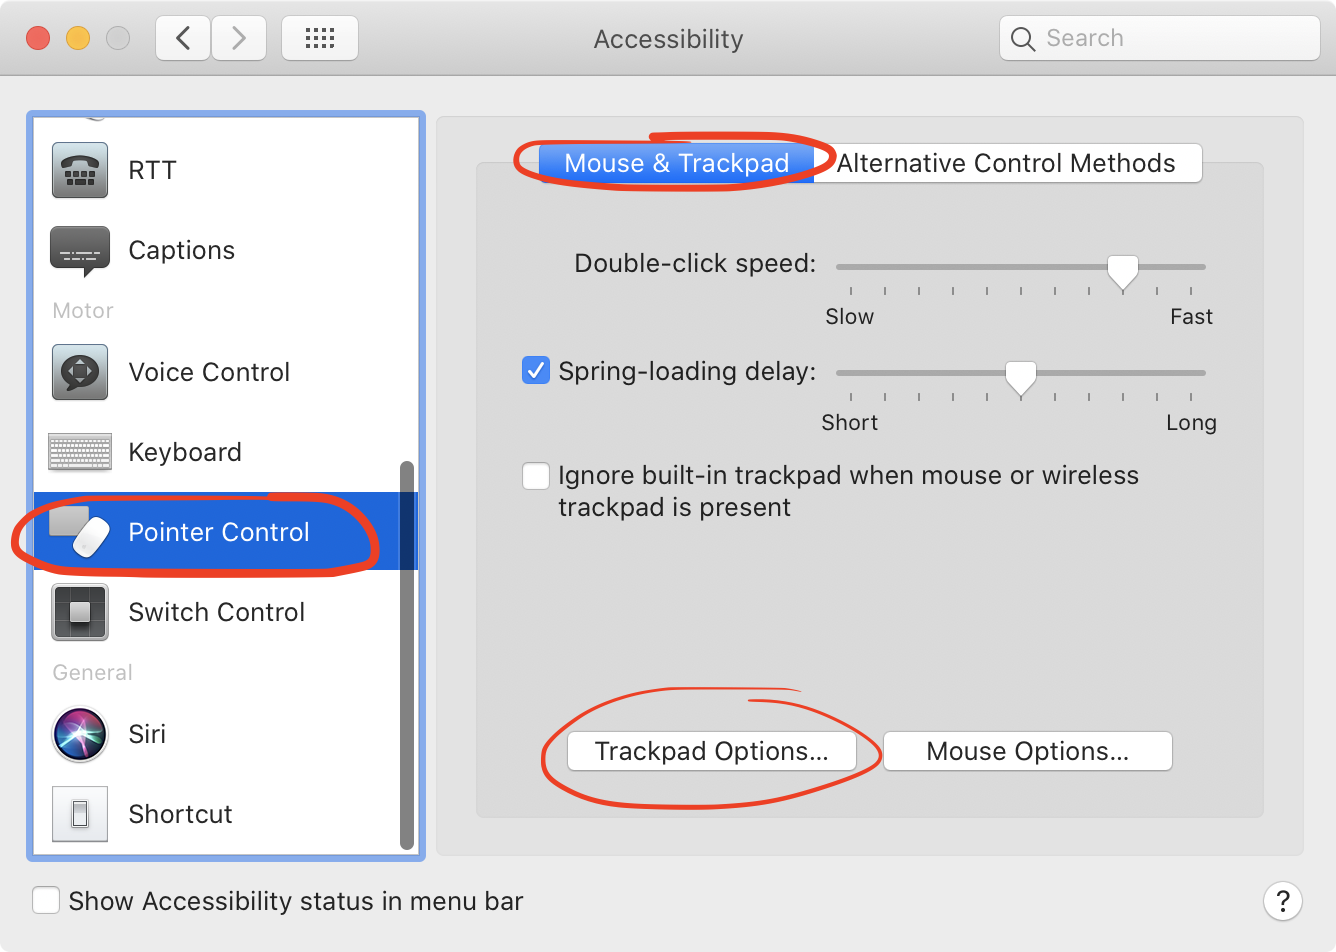
  • There will appear a sidebar from which you have to select the Pointer Control. If you cannot find this feature, then you must click on the Mouse & Trackpad option from the sidebar. (In new versions of the MacBook it appears as Pointer Control and in an older version of MacBook it appeared as Mouse & Trackpad).
  • After clicking on this, a submenu will appear that will appear two options that are
    • Mouse & Trackpad
    • Alternate Control Methods
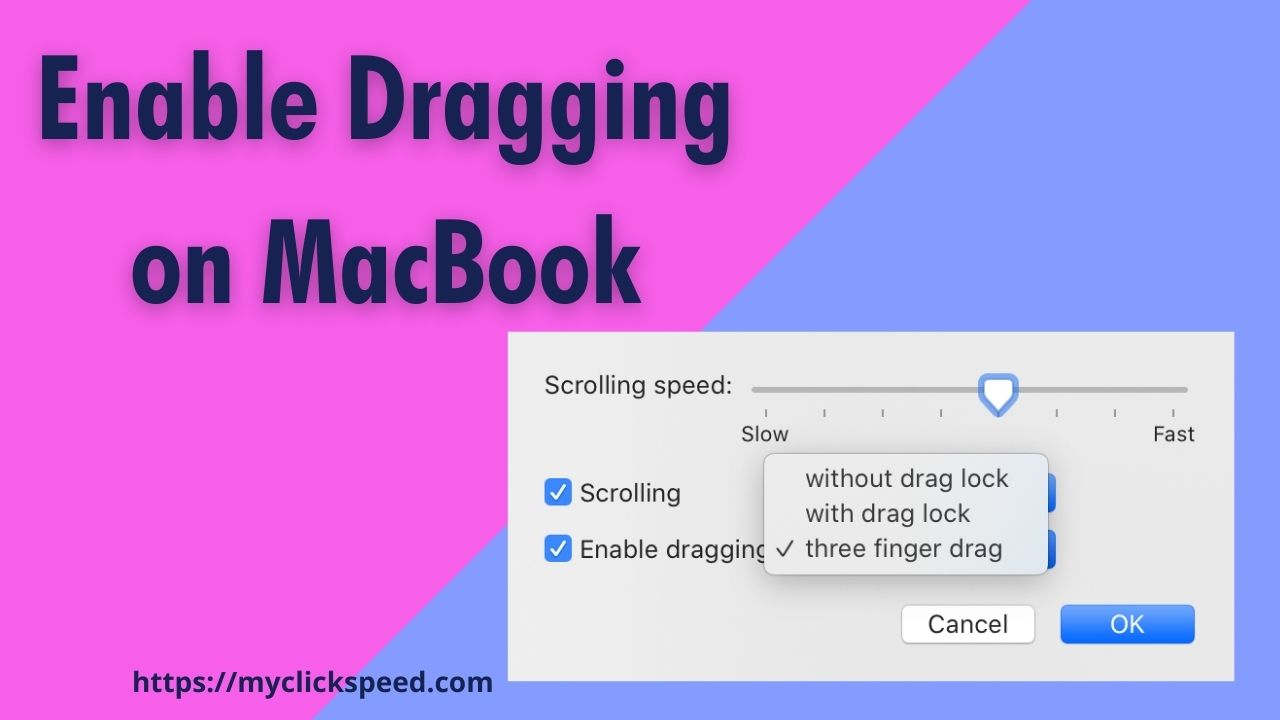
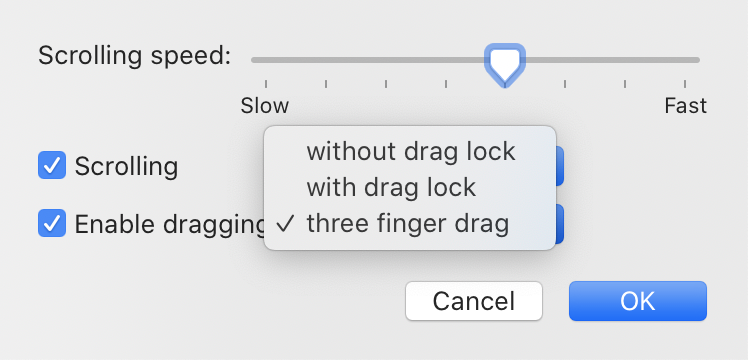
  • Make sure that you have clicked on the Mouse & Trackpad. And then Trackpad Options

Pointer Control Setting on MacBook

  • Scrolling a little bit will let you reach the “Enable Dragging” feature that you can click on to enable the dragging feature.

Enable Dragging on MacBook

  • The dragging feature in MacBook has been enabled.

Types Of Dragging In MacBook?

The MacBook also enables the user to select the type of dragging they want to engage in. The three types of dragging as supported by MacBook are:

  • Drag without Lock
  • Drag with Lock
  • Three-finger Drag

Three of these dragging functionality provide different ways of dragging. Like in the “drag without lock” and” drag with lock feature” the user clicks (not presses) the object that is to be moved in and then easily moves his finger to drag the object anywhere without having any need to press the trackpad with the thumb. In “three-finger drag” you can roll over three fingers on the trackpad to move the object anywhere and dragging it and dropping it with three fingers without any need of a thumb. No matter which of these three you choose to click and drag on MacBook pro, the traditional dragging i.e. with finger and thumb will be supported by three of them.


The most supported type of dragging for MacBook is a three-finger drag. However, if you are accustomed to three-finger drag you can also go on with it. All you need is to enable dragging and select any of the dragging types to enable dragging.

FAQs

You can easily drag and drop documents or other items to the destination folders or Dock by creating shortcuts on Mac desktop. Moreover, you can remove alias by dragging it until the Removing message appears.

For this purpose you have to enable the drag lock. Follow the steps to enable it: 

  1. Go to the system preferences.
  2. You will see an option of accessibility. Click on it.
  3. After that go to pointer control and click on Mouse & Trackpad option. 
  4. Go to the Trackpad options and you will see "Enable Dragging" . Choose the option of drag lock from the drop down and you are good to go.